I am reposting my wreath tutorial for those that didn't get a chance to see it last year and because I have revamped it! It's gotten a facelift! Come check it out! :)
I made my first tutorial on how to make a rosette wreath (just in case someone who follows me doesn't already know!) :) I know I didn't know how until I followed along with Faith Abigail Designs. This girl is a paper genius! Her tutorial was amazing, so I remade it with my own project.
I made my first tutorial on how to make a rosette wreath (just in case someone who follows me doesn't already know!) :) I know I didn't know how until I followed along with Faith Abigail Designs. This girl is a paper genius! Her tutorial was amazing, so I remade it with my own project.
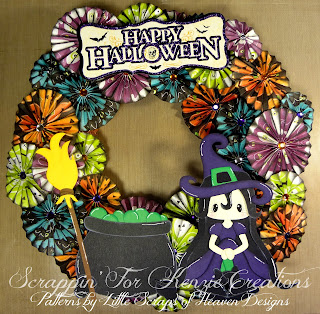
Okay, so here goes. I wanted to make a wreath for Halloween and I loveeedd the way Faith's came out so I scraplifted her idea and just used different paper and added a Happy Halloween Title to my wreath and an LSHD pattern. I LOVE the way it came out.. I am sooo proud that I finally made this!
So here is how I made it :)
First I wrapped an orange glitter ribbon around a styrofoam wreath from Michaels.
Then I chose 4 papers from K&Co's Spooktacular 12x12 paper pad
I then cut them into strips of 1.5x12 for the biggest rosettes, 1.25x10 for the medium rosettes, and 1x8 for the smallest rosettes. I scored each strip at every quarter inch with my Martha Stewart Score Board.
After scoring the strips I accordion folded each one or mountain-valley folded, and cut one section off each one so one end had a mountain fold and the other had a valley fold.
Then I added adhesive to one end and put the two ends together...
And got this. :)
Here is a picture of all my paper rosette rings.. I did every step in an assembly line way which made it easier I think.
39 in total. But that's because the 4 sheets of paper yielded this many. I only used 33 on my wreath and liked how it looked so I didn't add anymore. It depends on how big you want your wreath or how full.
Then I punched out circles, out of cardstock to glue to the backs and to keep the rosettes flat. Any size circle should work fine. As long as it's not bigger than your smallest rosette. Or too small to use a generous amount of glue.
I used a hot glue gun, I read from a bunch of blogs that this is the best adhesive to use since it bonds fast and holds strong and it's true!
Push the centers of the rosettes until they are flat and glue the circles onto the back to keep them that way.
Then you will have a pile of pretty rosettes!
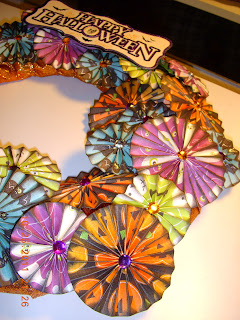
I added rhinestones in purple, orange, and clear to coordinate with my papers and inked the edges and folds of each rosette with black to create more contrast.
I hot glued each and every one on to the wreath until I liked the fullness of it.
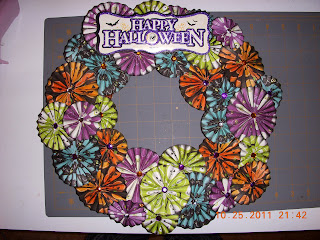
I added a "Happy Halloween" dimensional sticker from Recollections to finish my wreath and I LOVE IT! It made a perfect sentiment and the colors matched exactly :)
Final Product! :)
I pulled this wreath out this year and revamped it with a Double Trouble Witch from Little Scraps Of Heaven Designs along with her cauldron and broomstick to give it a little more oomph!
(sorry for my horrible lighting.... the only time I can do any crafting is late night when the little one is asleep so I either use flash or my lamp. I couldn't wait until morning to take pictures so this is what we get! lol)
HAPPY SCRAPPING!
Michelle:)


